
I've kind of been taking it a bit more easy in the shop these days, and enjoying a little well deserved time spent doing other things. My hobby, besides smithing, is wooden boats. I'm working on my second wooden boat model.
The model I am currently working on is a 1/8-scale model of a boat called "Truant." It's a good bit different than the model "Curlew" I built several years ago, and has been extremely interesting to build.
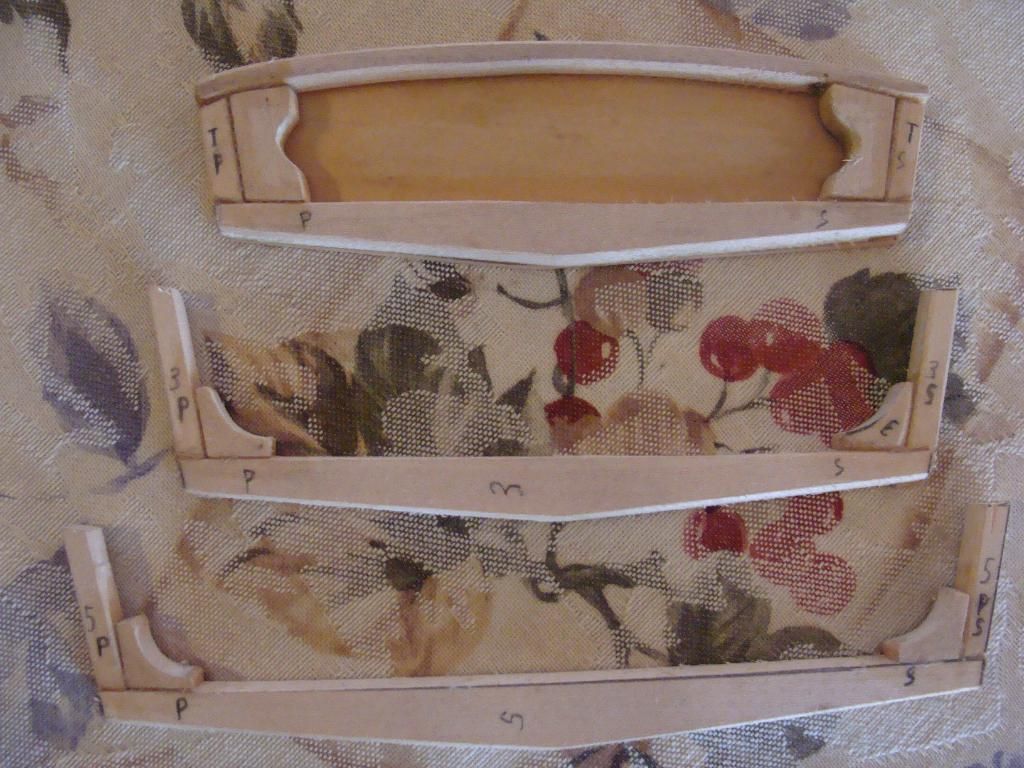
Here are the three primary frames that will make the boat the shape it's going to be. They are glued up and ready to go!
Here are the two side planks glued to the stem. The stem is a piece of wood that makes up the front of the boat.

I hand carved a "cutwater" or stem face piece and glued it to the front.

This is a structural piece called the breasthook! It helps to strengthen the front of the boat.

Here is the transom glued in. The transom is the very back of a boat. The string is being used as a make-shift clamp system to hold everything in place while the glue sets!

The piece glued in the corner of the frame, is called a "knee" and adds greatly to the strength of the frame.

Here I am adding glue where needed!

One the two side planks and the primary frames were all glue together, I had the basic profile of a boat. Then I had to go in and put in the rest of the frames. There were 7 frames in all, plus the stem and transom. Each frame is completely different in size and shape from the others. In such small models, clothes pins make great "clamps."


After all the frames were in, I cut and glued the two bottom planks on. The slot is for a piece called the "center-board."

Then came the top deck beams! These are boards that will support a deck on the from or "forward" section of the boat.

I also glued on a trim board down either side.

Where the side planks and the bottom planks meet, is obviously the most likely area for leaks. So, I mixed up my water-proof glue and wood dust and filleted the joint, using a wooden puddy knife fabricated from scrap.

Next I glued in the "mast step" and the "mast partner." The "mast" is a long stick that will hold the sails. The "mast step" is a board in the bottom of the boat that the mast sits on top of. The "mast partner" is a board above the mast partner that supports the mast.

Hey it looks like a boat! I must be doing something right!

Next I glued some support pieces on the forward interior of the boat that will help brace the mast supports later on. I also glued in the "centerboard housing." The centerboard is a board that sticks down into the water through the boat. It's function is to make the boat sail forward instead of sailing sideways.


I also layed a layer of wood over the central seam in the bottom of the boat. These boards will help seal this seam and make it water-tight.

I painted the entire forward section brown, and then began decking it over. The decking wood is black-walnut.


After the forward area was decked over and everything trimmed and tidy, I made a door to shut off the forward section completely. I wanted the door to be removeable, so I made it to where it could slide in and out.


This is the door!


I added some decorative finishing trim around the mast hole and the centerboard trunk.

And finally, the latest things I've done is to paint the aft interior, and add decking to the interior.
